Getting Started
Sign up at tryhamster.com. The onboarding wizard helps you add context and invite your team; then start with the outcome you want and let Hamster shape the work beneath it.
The Onboarding Wizard
When you create a new Hamster workspace, you'll walk through a structured onboarding flow designed to get you up and running quickly:
-
Team size selector — Select your team size (Solo, 2–10, 11–50, or 51+). This helps Hamster personalize its guidance for your situation.
-
Persona-steered kickoff — Based on your team size and role, Hamster generates a personalized kickoff that introduces the product and asks structured questions about your work. These questions help ground the AI's initial understanding of your context.
-
Context seeding — Upload documents, connect tools (GitHub, Slack, Figma, Linear, Jira, and others), or share a website. The more context you provide upfront, the better Hamster can help you.
-
Invite teammates — Add collaborators to your workspace. Reviewer seats are free, so you can invite stakeholders and partners without using paid seats.
-
Success — Your workspace is ready. Hamster has seeded initial Blueprints from your context and is ready to help you draft Briefs, generate Plans, and ship code.
Throughout the wizard, Hamster provides guidance tailored to your team size and context. If you skip context in the wizard, Hamster will offer a chat nudge to add context later — you can always seed context reactively.
Adding connections and inviting teammates (covered below) makes everything sharper — more context means more grounded Briefs — but the workspace is ready to use before any of that happens.
1. Name the Goal and shape the first work
Open Hamster Chat. Hamster starts with one question:
“What are you trying to achieve?”
Answer as casually as you like. For example:
“I want to build a login app for my lodge.”
Hamster reflects your answer as one clear Goal statement, using the language you already use. It does not ask you to choose a framework, Metric, or hierarchy. It then confirms:
“That sounds like a great goal — I’ve captured it.”
From there, Hamster immediately shapes the Initiative that moves that Goal and drafts the first Brief beneath it. Goal capture happens in passing, so the first run stays conversational: Goal → Initiative → Brief.
In workspaces that support Goal creation from chat, Hamster saves the Goal. Otherwise, it carries the confirmed Goal in the conversation and continues into the Initiative and Brief without blocking.
Across this flow, Hamster is the harness. It automatically applies the relevant Methods while it shapes and delivers the work. Methods are optional components you can customize when you want Hamster to follow your own conventions; choosing or importing one is not an onboarding step.
2. Add useful context
Hamster is most useful when it can read the work your team has already accumulated, so the next thing worth doing is connecting the tools you already use.
Most teams find GitHub and Slack are the two highest-leverage Connections to start with — GitHub because it's the largest single source of code-level context, Slack because it's where most of your team's running conversation already lives. From there, add Linear or Jira, Figma, Notion, and Google Drive as the need comes up.
Each Connection widens what the AI can read when it works on a Brief, generates a Plan, or proposes an initiative. Two Connections is plenty to begin with; the rest tend to grow in naturally as you use Hamster more.
3. Answer structured questions
After the wizard, Hamster may show you follow-up questions about your work in the home chat. These questions help the AI understand your team's priorities, constraints, and existing context. Answering them unlocks personalized suggestions and more relevant AI guidance. You can skip them and come back later — Hamster remembers which questions you've answered.
4. Draft your first blueprints
A Blueprint is the English description of something stable in your business — a product, a system, a team. The easiest way to start is to chat with Hamster about what you'd like a Blueprint for:
"Build me a Blueprint for our checkout product. The repo is
acme/checkout. It's used by first-time buyers."
Hamster reads what's already in your Context Graph, drafts a Blueprint, and hands you back something concrete to react to and edit. You can repeat this for the systems and surfaces that matter most — three or four Blueprints covering your highest-traffic products is usually plenty to ground every Brief that follows.
5. Take the Brief through delivery
The fastest way to feel what Hamster actually does is to run an idea you've been kicking around through the whole loop, end-to-end.
Try it on your own first
A first delivery usually looks like this:
- Open the Brief Hamster drafted beneath your Initiative.
- Refine it in chat. Push back, clarify scope, and add any missing context.
- Generate a Plan. The Brief becomes a structured Task breakdown.
- Hand it off to a Cloud Agent, which picks up the Plan and ships a PR.
Doing this once on your own first lets you feel the loop — Goal, Initiative, Brief, Plan, delivered — before you bring anyone else into it.
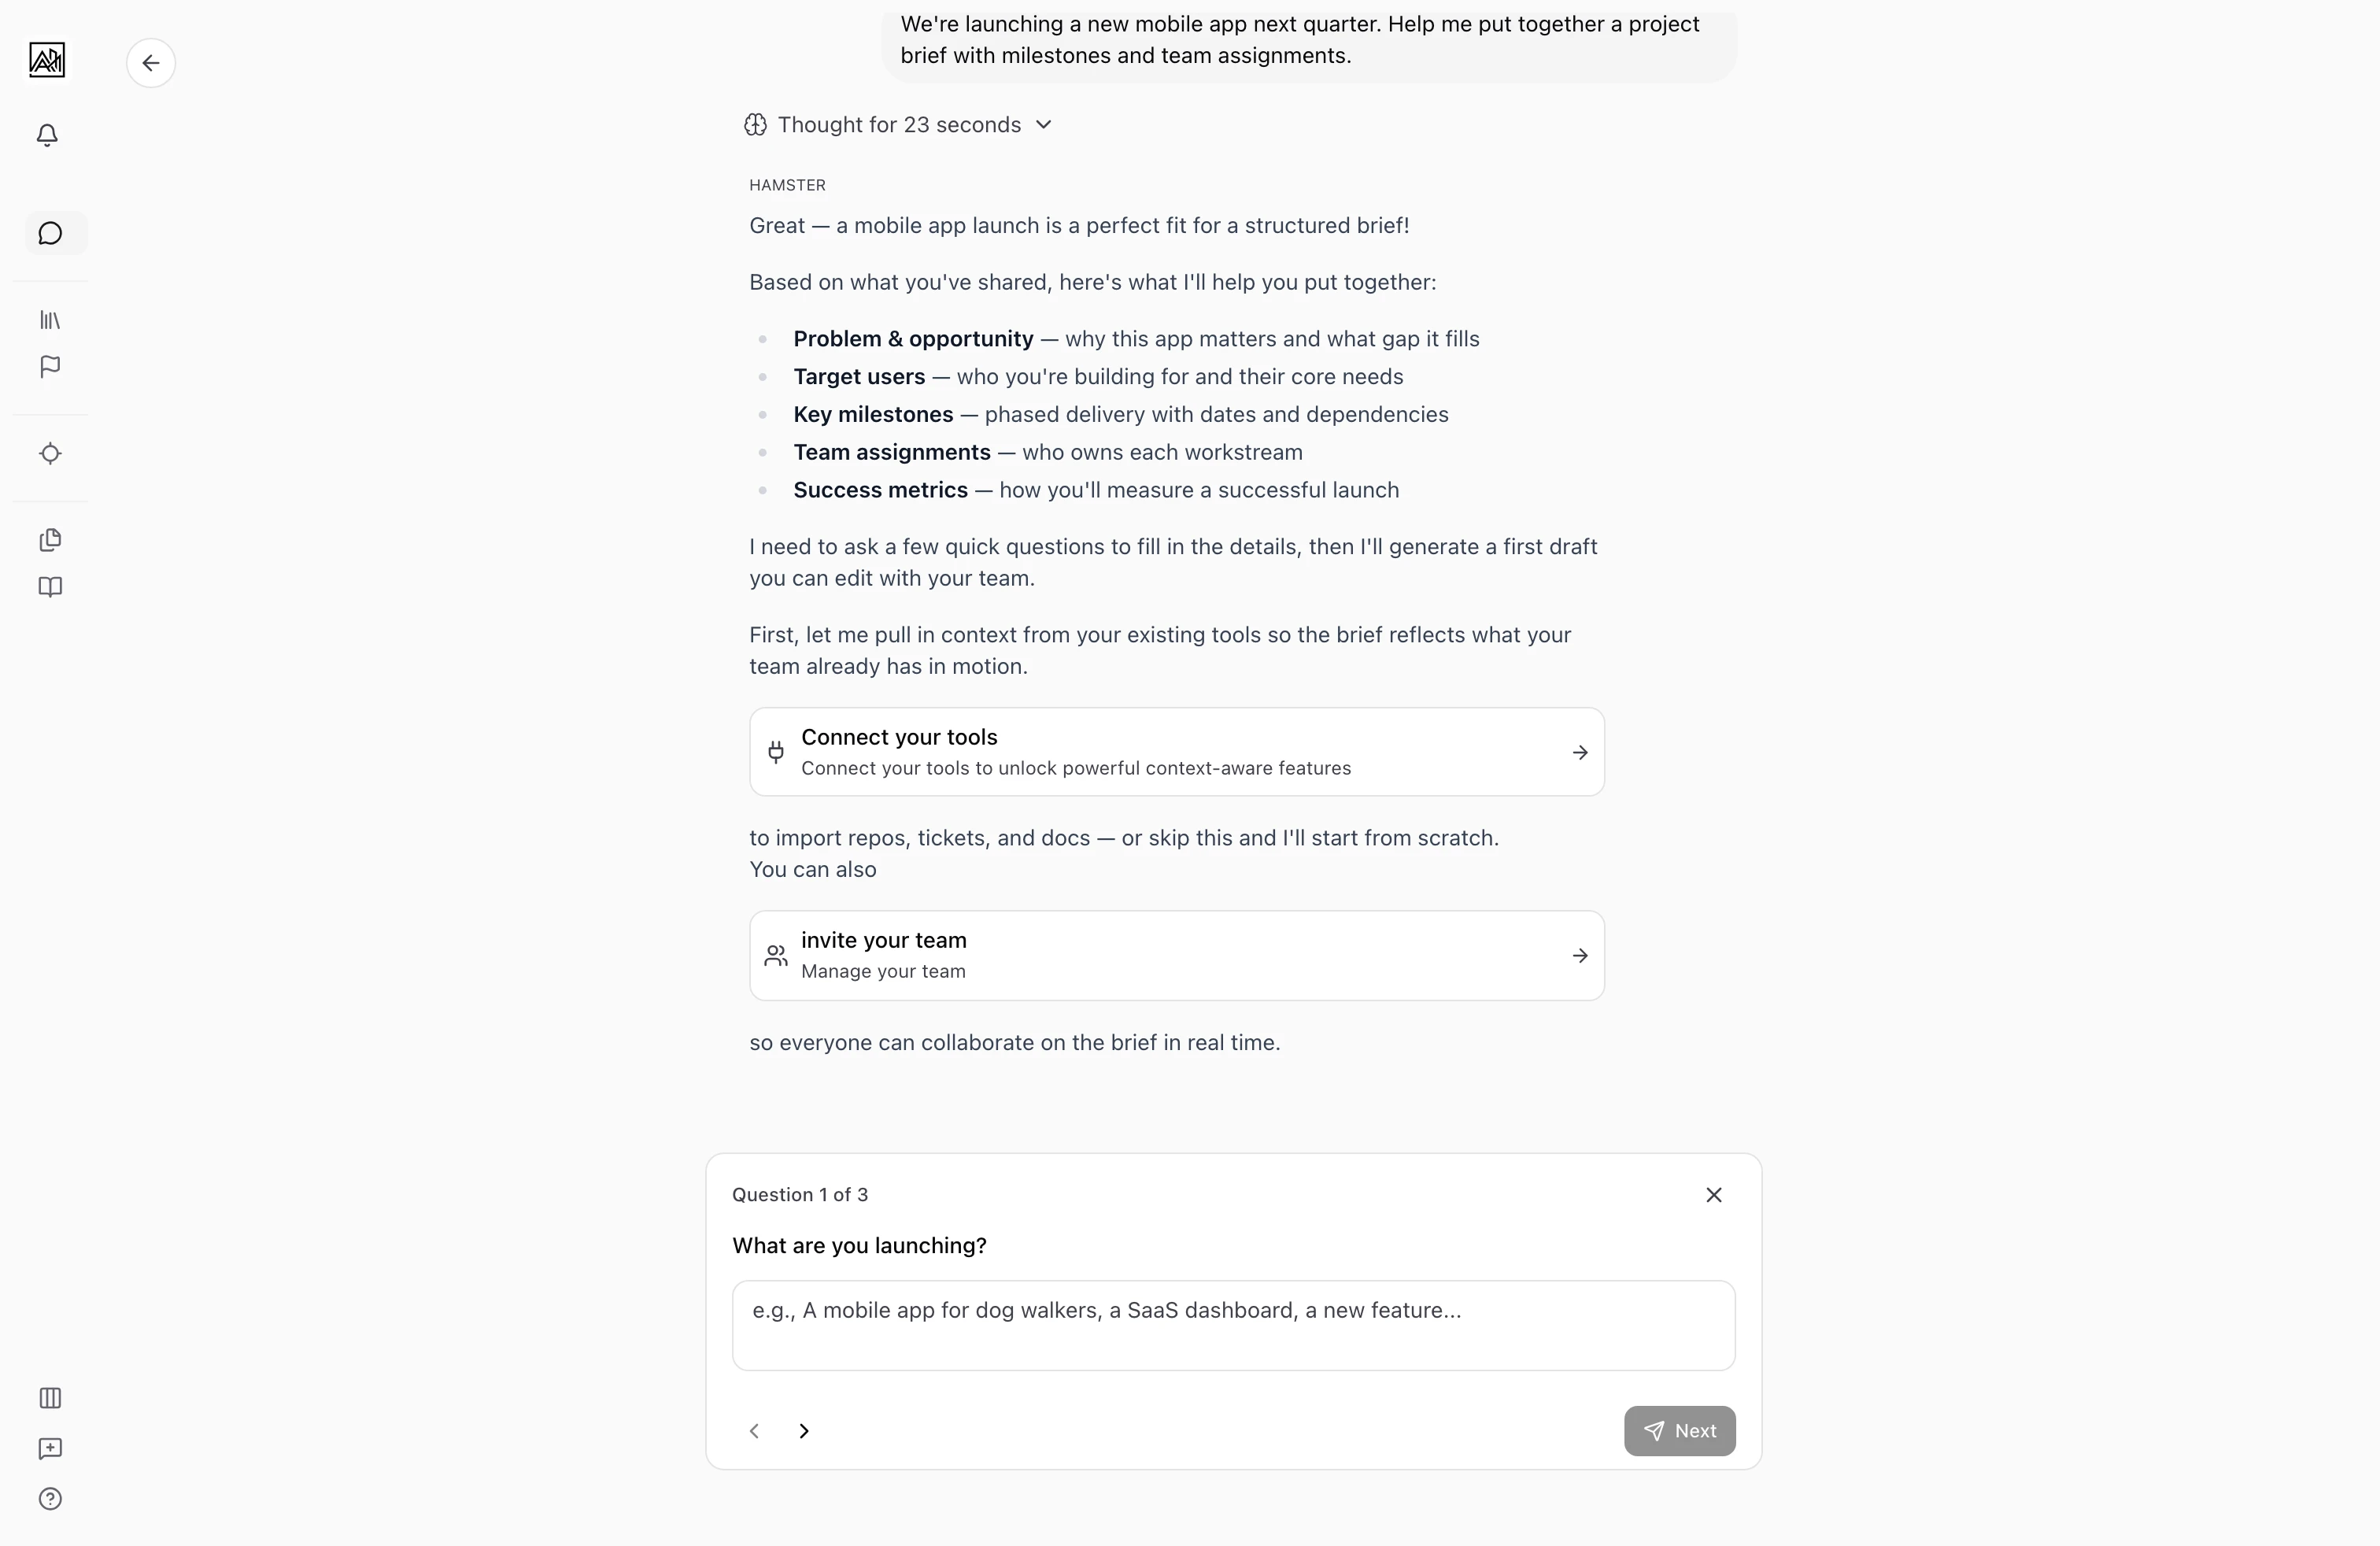

Then bring your team in
Once the loop feels familiar, run it again with other people in the room. Invite teammates — Reviewer seats are free and unlimited, which makes them the right default for stakeholders who only need to read Briefs and vote on alignment.
The flow looks the same as solo: align on the Goal, share the Initiative and Brief, gather feedback, collect alignment votes, and deliver once everyone has signed off. The Blueprints and Briefs you've already built carry full context, so teammates joining a discussion can pick it up without needing a half-hour catch-up first.
6. Engineers: pull context into your existing tools
If you ship code, you don't have to leave your editor. Connecting the CLI or the MCP Server lets your IDE — Cursor, Claude Code, or anything else that speaks MCP — pull a Brief, its Plan, the relevant Blueprints, and the connected context straight into your session. The Brief becomes the prompt; your Context Graph becomes the grounding; you write the code.
Cloud Agents are the right call when you want hands-off delivery. The CLI or MCP fit better when you want full control with full context. Both paths read from the same Briefs, Plans, and Blueprints, so you can pick whichever suits the work — and switch on a per-brief basis.
Home Chat Nudges
On the home welcome screen, Hamster shows personalized next-step suggestions based on your workspace state, team size, and recent activity. These dynamic nudges refresh as you work:
Only a persisted, personalized suggestion is shown. On a cold start Hamster shows a loading state while the suggestion is generated; if no suggestion is available, the space remains empty instead of substituting canned persona prompts.
- Newly created artifacts trigger Hamster to suggest immediate next actions (refine the Plan, invite feedback, prepare for delivery).
- Empty context prompts Hamster to suggest connecting tools or uploading documents.
- Team changes may prompt you to invite additional teammates or set up shared knowledge.
Click a suggestion to start a pre-filled chat or navigate to the relevant feature. Dismissed suggestions reappear based on workspace state, so they adapt as you ship.
Where to go next
After the first-run loop, use the navigation strip to return to Goals, Initiatives, Briefs, Routines, Blueprints, Methods, and Connections without interrupting your work.
- Concepts — the model you'll keep coming back to
- For your stage — practical setup for teams of different sizes
- Joining a team — if you got invited rather than starting fresh